Tuesday, September 27, 2011

SPICED RAW SEED BUTTER


One of my favorite snacks is homemade gluten-free bread smothered with this wonderful pepita sun seed butter by Naturally Nutty. Much of the time I find myself scraping the bottom of the jar wishing I'd had a little more forethought to have an extra in the house. So, inspired by their brilliance, I decided to see if I could make my own - a spin-off version of sorts.


[WHY I GO NUTS ABOUT SEEDS]

Pumpkin seeds have one of the highest protein percentages of all the nuts and seeds and are an important source of omega-3 fatty acids. These larger seeds are wonderful source of iron, zinc, phosphorus, and vitamin A. Sunflower seeds contain more protein than beef and are a great source of calcium, phosphorus, iron, vitamin E and some of the B-complex vitamins. They may be helpful in relieving constipation and host some cholesterol-lowering agents. Flaxseeds are an awesome heart tonic as well as help to normalize a woman's menstrual cycle, an intestinal cleanser and bowel regulator, and may help strengthen immunity, sooth sore throats and coughing, and prevent cancer. Hemp seeds are energizing little nuggets, are an important source of omega-3 fatty acids, and have anti-inflammatory properties. Coming in at about 20 percent digestible protein, they have an almost complete amino acid profile and are a good source of calcium, iron, phosphorous, magnesium, zinc, copper, and manganese.


Source: The New Whole Foods Encyclopedia by Rebecca Wood

This recipe is what I like to call "a wonderful work in progress", meaning I'll be tweaking it each time I make it until it comes out exactly the way I want it. And, in the mean time, feel free to do the same!

1/2 c. raw pepita [pumpkin] seeds
1/4 c. each raw sunflower, flax, and hemp seeds
1/8 - 1/4 c. maple syrup [for sweetness] or 1/8 - 1/4 c. grapeseed oil [or oil of choice]
2 tsp. ground cinnamon
1 tsp. ground allspice
1 tsp. vanilla extract or 1/2 tsp. vanilla powder
pinch Real Salt sea salt

Grind seeds individually in a spice or nut grinder until very fine. Once ground, place all seeds, spices, salt, and vanilla in a food processor and process on high until mixture becomes creamy, could take up to 4 minutes. If mixture gets stuck slowly drizzle in oil, a little at a time, until mixture can be blended again. Once desired consistency is reached, place in glass jar, cover, and store in refrigerator. The beautiful thing about this spread is that you can make it as chunky or creamy, sweet or salty as you like. Serve on a warm piece of gluten-free bread, use in smoothies or nut/seed milks, add to oatmeal, or get creative! It's delicious with a warm mug of spiced hot cider. Happy Fall!

Friday, September 23, 2011

10 SIMPLE COLD WEATHER MEALS: PART II

What better way to invite fall [happy first day of fall!] into the present than by making something warm and nourishing! This post is a continuation of Part I. Some of these recipes take a little advance preparation [like thawing or baking] but for the most part, are simple and quick. The trick to really making any of these meals pay-off in time is making a double or triple batch, especially with the soups, and freezing the leftovers in glass jars [remember to let it cool before you place in the freezer or the glass could break]. This allows for healthy and easy lunches or dinners for weeks to come!

Oh! As always, if you are using any animal products [meat, eggs, etc.] please, please, please buy local, organic, pasture raised products. If this is not an option, simply forgo the meat because the alternative isn't meat at all [or eggs, or cheese, or any of the other animal derived products we enjoy today]. Instead they are chemicals and artificial colors, hormones, antibiotics and other bio-hazardous "material", disguised as meat, that are making our girls develop faster, bringing on menses much earlier than intended, causing bad-bacteria to strengthen which in turn creates more dangerous and deadly viruses, and bringing on a whole host of diseases, including cancer. And if you see eggs labeled as "vegan" or "vegetarian" put them back. Any pasture raised animal is bound to snatch up a critter or two meaning eggs under these labels have come from permanently cooped up chickens given grain or corn-based feed, which I'm sure is not what nature intended. These are serious issues that are so easily [and deliciously!] solved - consume less meat and, when you do indulge [because that's what it is my hunter-gatherer friends, an indulgence] make sure it is organic, pasture raised, and local!


[MEAL 5: DINNER OMELETTE WITH POTATOES]


FOR THE POTATOES


2 - 3 medium redskin potatoes, diced
1 tbsp. extra virgin olive oil
Real Salt sea salt, Italian seasoning, and granulated garlic [to taste]

In large cast iron skillet, heat oil. When warm, add potatoes and toss until lightly covered with oil [add more oil if necessary]. Cook on medium heat until potatoes are soft and lightly browned [stirring often to prevent sticking]. Remove from heat and toss with salt, seasoning, and garlic.

FOR THE OMELETTE

1/2 tsp. extra virgin olive oil
3 eggs, organic and pasture raised
1/8 c. non-dairy milk of choice
5 - 6 leafs of kale, chopped
2 sun dried tomatoes, chopped
2 fresh sage leaves, ripped into small pieces [or 1/2 tsp. dried]
1 tsp. dried parsley
pinch of Real Salt sea salt and garlic powder

Whisk eggs and non-dairy milk until yolks are well combined. Heat oil in small cast iron skillet. When oil is just heated, pour in egg / milk mixture. Toss veggies and herbs in bowl. When the bottom of the egg has cooked pour in veggie mix. Cook until the egg has just become solid and then gently fold egg over itself [two spatulas work well here] so it is folded in half with the veggies in the middle. Cook until bottom of egg has just browned lightly and flip. Repeat on other side.


[MEAL 4: ADULT GRILLED CHEESE WITH TOMATO BISQUE SOUP]


This sandwich is one of my husband's favorite meals. I make a whole loaf worth and freeze the ones he doesn't eat. Pair it with a soup and this makes a great "I don't know what the heck to make for dinner and don't feel like cooking" meal that is reminiscent of any bakery's [think Panera] soup and sandwich option...only better!

FOR THE SANDWICH

1 loaf of GF Bread of choice [if you make your own, slice and freeze the other loaf]
goat cheese [organic and local if possible] or non-dairy cheese of choice
roasted red pepper spread [I use my homemade, canned version but organic store bought will work here]
non-dairy butter spread [try Earth Balance Soy-Free] or Ghee

Butter one side of each piece of bread, in pairs of two. Spread red pepper spread on the non-buttered side of one of the slices in each pair. On the other piece [per each pair], spread the goat cheese or cheese of choice [also on the non-butter side]. Create sandwiches and set aside.

Heat a medium to large cast iron skillet until hot. Carefully place two sandwiches in the skillet and cook until golden brown. Flip and repeat.

FOR THE SOUP

[Again, I'm not sure where this recipe originated from so to the creator, I'm so sorry!]

In dutch oven or medium-sized soup pot saute the following until soft:

2 tbsp. ghee or non-dairy butter [see above for options] + 2 tbsp. olive oil
1 medium onion, chopped
1 stalk celery, chopped or sliced or 1 tsp. celery seed
2 carrots, chopped or sliced
4 cloves of garlic, minced

Add 5 tbsp. of GF All-Purpose flour* and saute another 3 minutes, stirring often.
Pour in 5 c. of chicken or vegetable broth and 1, 28-ounce can of whole tomatoes with juice [do not drain].
Bring to boil, stirring often.
Add 3 sprigs of chopped parsley, 3 sprigs of thyme [thick stems removed], and 1 bay leaf.
Simmer for 30 minutes.
Stir in 1 c. regular coconut milk, 1 1/2 tsp. salt and a dash of ground pepper.
Using blender or hand blender, puree soup until smooth and creamy.
Reheat in pot and serve.

*For a homemade GF All-Purpose Flour blend mix together 1/3 c. each brown rice or millet flour, tapioca flour or arrowroot powder, and potato starch. This makes 1 cup of flour.

[MEAL 3: BUTTERNUT SQUASH SOUP WITH TOASTED BREAD]


In this recipe I recommend cooking a couple squash and freezing an that goes unused so it will be ready for the next time.

FOR THE SOUP

1 whole butternut squash, cut in half and cored [remove seeds and strings]
1 can of regular coconut milk
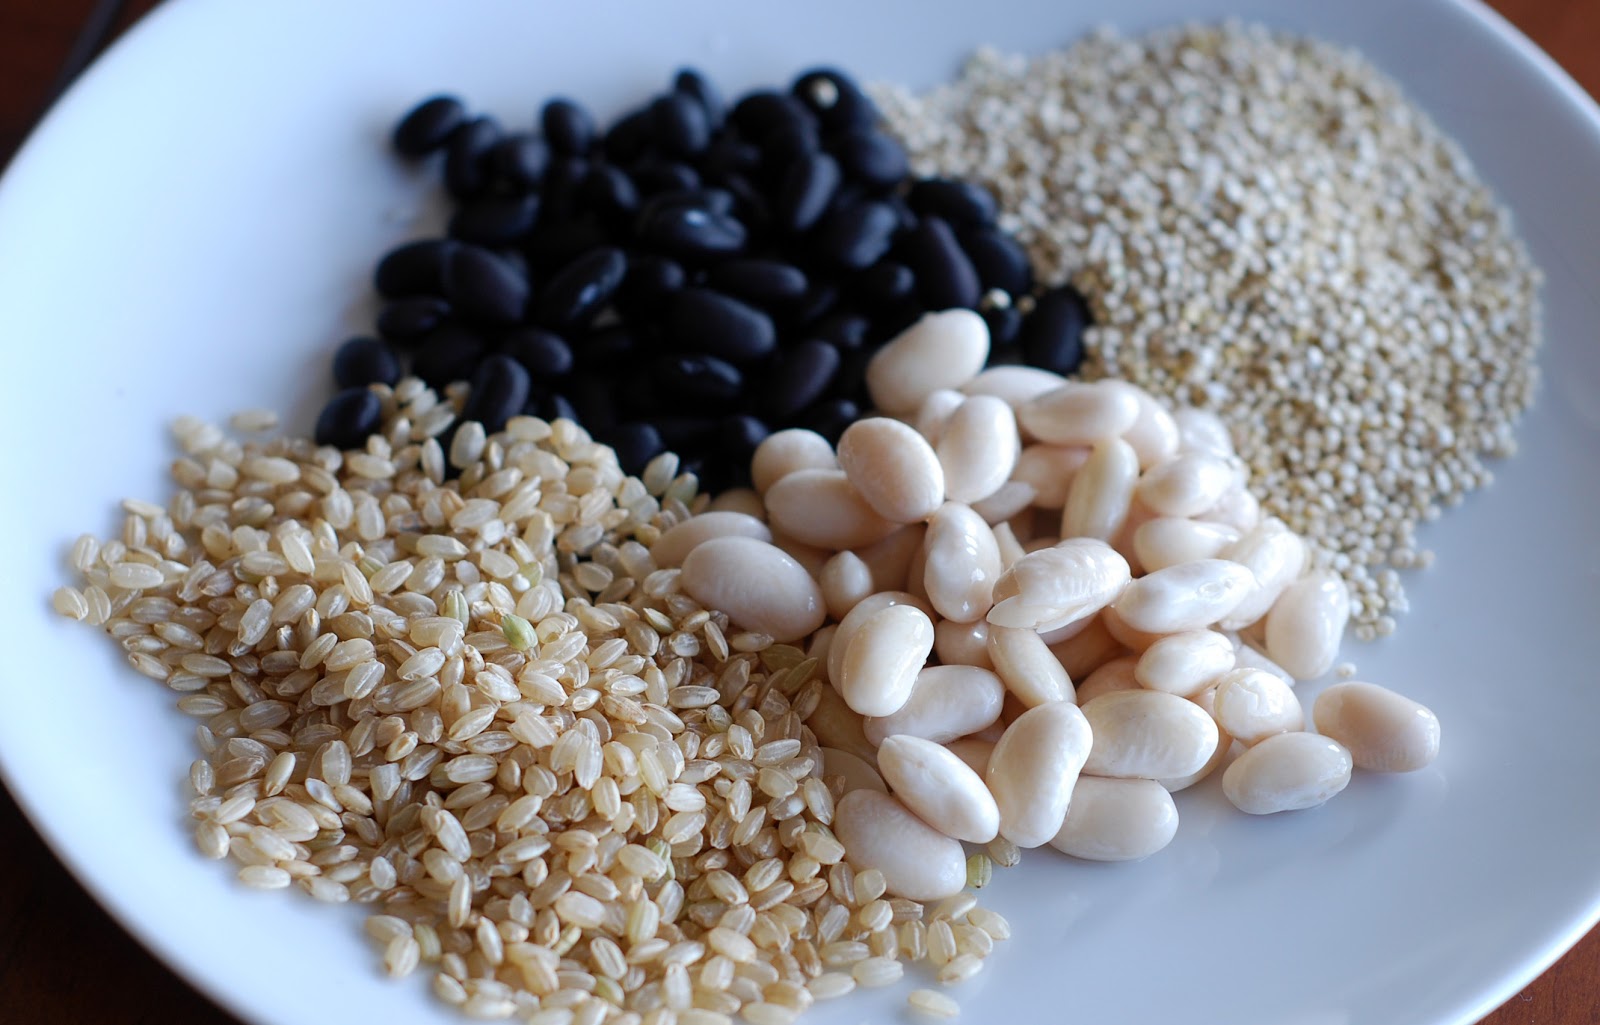
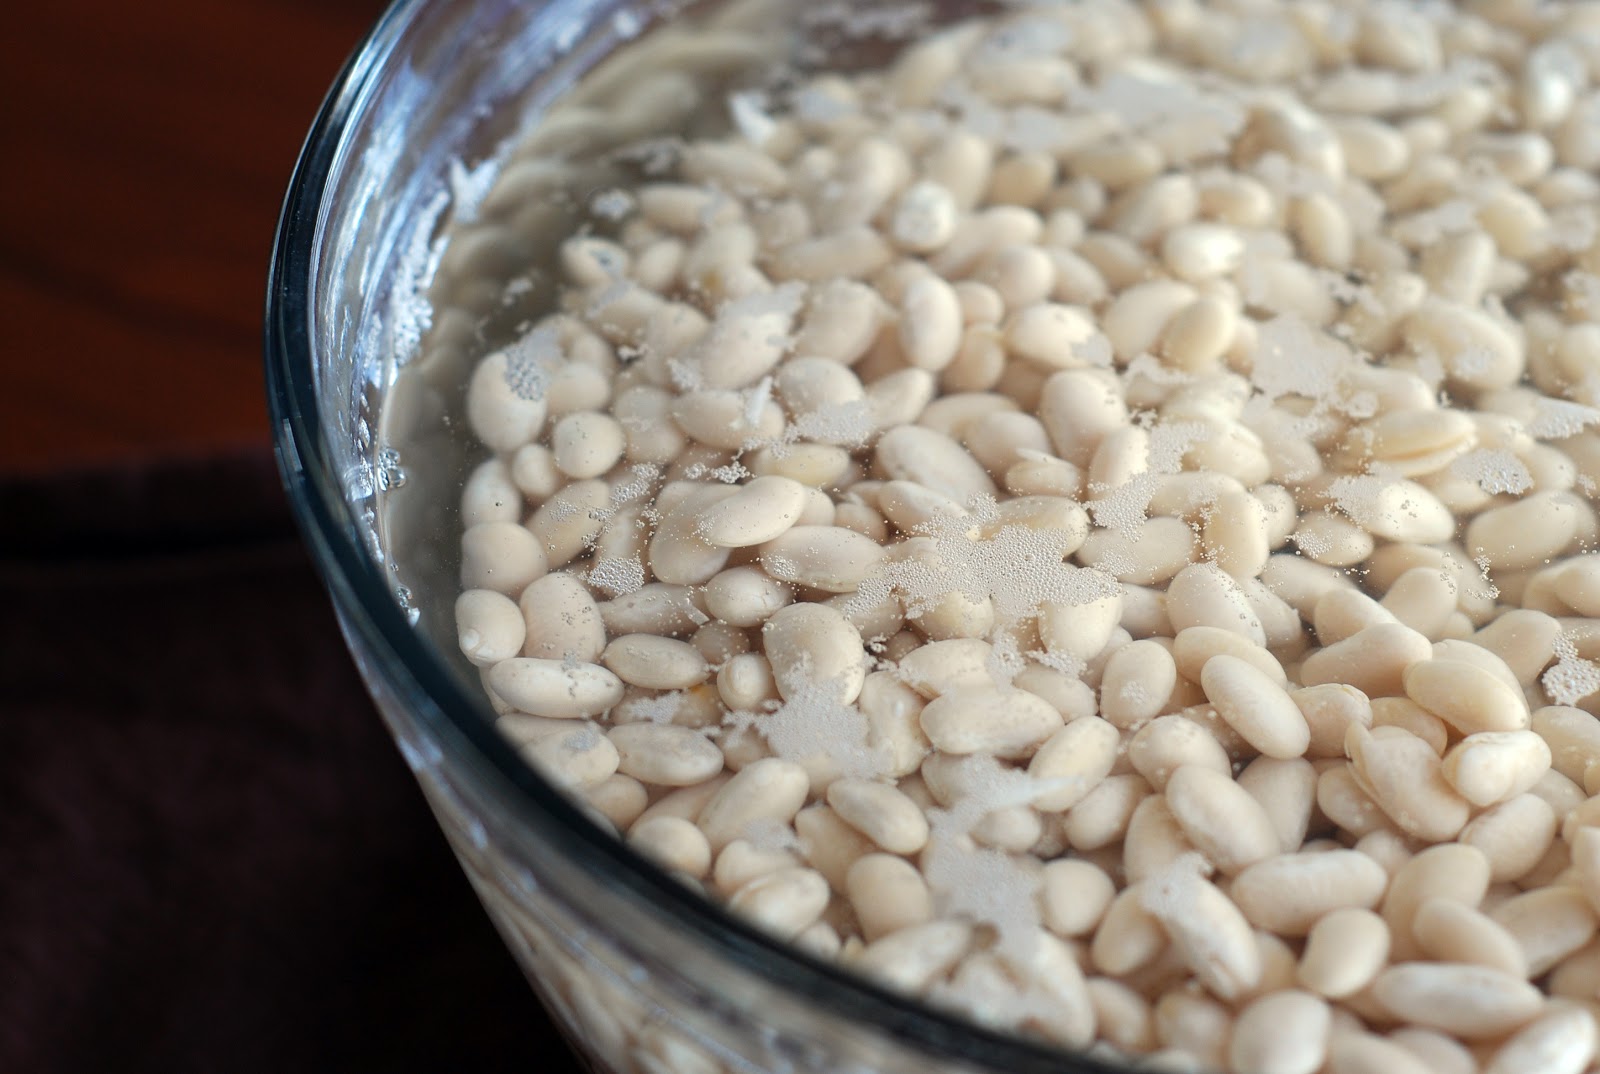
1 15-ounce can Great Northern beans, drained [or 1 1/2 c. homemade]
1 medium onion, peeled and chopped
2 - 3 cloves garlic, minced

3 - 4 large baking potatoes, peeled and cubed
1 tsp. sage
1/2 tsp. ground rosemary
salt and pepper to taste

Preheat oven to 400 degrees. Place squash halves on a baking sheet, inside facing up. Bake for 40 minutes or until very soft. While this is baking, place potatoes in a medium saucepan and cover with water. Add a pinch of salt and bring to boil. Boil until potatoes are very soft.

Remove squash from oven and allow to cool until you are just able to handle them. While the squash is cooling, saute the onion in 1 tbsp. of extra virgin olive oil until soft and translucent. Add garlic and saute for another minute. Set aside.

Peel the skin away from the flesh and place in blender with cooked potatoes, sauteed onion and garlic, and all remaining ingredients. Blend [leaving a small gap in the blender to to release and built up steam] until very smooth and creamy. You may have to do this in batches.

Place soup in saucepan or dutch oven and bring to boil. Simmer on low heat for 15 minutes.

FOR THE TOAST

Butter one side of each piece of bread using ghee or non-dairy butter. Sprinkle with Real Salt sea salt and granulated garlic. Place in toaster oven [or standard oven] and toast until just crunchy on outside [for a standard oven, bake at 400 degrees 5 - 10 minutes]. 

[MEAL 2: ROASTED ROOT VEGETABLES WITH QUINOA]


This roasted root vegetable recipe is from Simply in Season [p. 262] and is one of my absolute favorites, especially when I am overrun with root vegetables from my winter CSA share.

1 medium onion, sliced or chopped
4 - 5 garlic cloves, peeled but whole
6 - 8 cups of any winter vegetables [potatoes, sweet potatoes, carrots, turnips, parsnips, rutabagas, beets, winter squash / pumpkin], peeled and chopped into 1" slices or cubes
2 tbsp. extra virgin olive oil
1 -2 tbsp. dried herbs [rosemary, sage, and thyme are all great fall / early winter herbs that are divine here]


Preheat oven to 425 degrees. Toss all, except for onion and garlic, with oil and herbs. Place is glass baking dish and bake for 10 minutes. Add onion and garlic, mixing into vegetables. Bake for another 20 - 30 minutes, stirring occasionally, until vegetables are tender. Season with salt and pepper on a bed of cooked quinoa [cook according to package instructions].

[MEAL 1: CREAMY BROCCOLI SOUP WITH PUMPKIN FRIES]


I slightly adapted this soup recipe from the October 2011 Food Network Magazine [p. 108].

FOR THE SOUP

2 tbsp. extra virgin olive oil
1 medium onion, finely chopped
2 stalks of celery, chopped or 1 tsp. celery seed
2 c. chicken or vegetable broth
2 c. Great Norther Beans [if canned, drain]
1 lb. russet potatoes, peeled and chopped
1 lb. sweet potatoes, peeled and chopped
1 bay leaf
Real Salt sea salt and pepper, to taste
2 c. broccoli florets

Heat olive oil in a dutch oven or large saucepan. Saute onion and celery until soft. Add broth, beans, bay leaf, 2 c. water, both potatoes, and 1 tsp. salt and 1/4 tsp. pepper and bring to boil. Reduce heat to low and simmer until potatoes are very soft. Meanwhile, steam broccoli until just tender.

When the potatoes are tender, remove the bay leaf and place soup in blender [you may have to do this in batches]. Puree until smooth. Return to pot and stir in broccoli florets and any additional salt and pepper.

FOR THE FRIES

1 small pie pumpkin
1 - 2 tbsp. extra virgin olive oil
1 - 2 tbsp. Italian Seasoning
pinch cayenne pepper
2 tsp. ground paprika
Real Salt sea salt, to taste
Freshly ground pepper, to taste

Cut stem piece of pumpkin off and remove seeds and strings [save the seeds for toasted pumpkin seeds!]. Carefully cut the pumpkin into thin slices [or fries] and remove shell. Preheat oven to 375 degrees. Toss with oil and all seasonings in a glass or stainless steel bowl. Transfer to a parchment paper lined cookie sheet and lay out in a single layer. Bake for 20 - 30 minutes or until just soft. Broil on high until just browned. Flip and repeat broil until reverse sides are browned.


Tuesday, September 20, 2011

CELEBRATING HOW FAR WE'VE COME

This morning happens to be one of those rare times when the baby sleeps in [albeit probably because she was up a lot last night, but still] allowing me to either get some things done or lazy about in bed reading for a bit. This morning I chose the later and finally picked up a magazine I have been intending to read since, this is a bit embarrassing  July. I am so glad I did.

This particular magazine in this particular issue is celebrating 40 years of publishing. As an act of looking back and reflecting [as most of us do on our monumental birthdays] the publishers decided to put together a list of 40 improvements, or maybe journeys, that this country [and our world] have undergone in the last four decades. It is inspiring to me to see what people with a lot of passion, discipline, and vision can accomplish, especially when it betters the whole of humanity.

So to those of you who have and are working for a better world, thank you. For those of you who get up with the vision of a new earth, and then go out and work hard to make sure it becomes reality, thank you. To those of you who put good, whole food based meals on your child's plate knowing that you are giving them a future worth living, thank you. To those of you who go out to the garden each morning and every evening to pick bugs off leaves instead of spraying them with deadly chemicals, thank you. To those of you who go through your day with a smile on your face and love in your eyes, thank you. To those of you who are determined to provide organic foods at a decent price, thank you. To those of you who believe there is an alternative answer to disease and illness and demand it, thank you. To those of you who take on the government and consumer giants who are determined to hang on to the notion that "fast, cheap, and nutritionally hollow" is the way of America, thank you. And for those of you who kiss your child, give them a hug, tell them how much you love them and make time for them each day, thank you.

You all, and many more unmentioned, are the ambassadors of a new creation and we are so honored to have you.

Here's the list of Natural Health's "40 Biggest Strides". I encourage you to read them. May they inspire you to continue what you're doing and grow in place that may be new territory.

http://www.naturalhealthmag.com/health/40-biggest-strides


Saturday, September 17, 2011

CREAMY PUMPKIN ICE CREAM AND BABY'S PUMPKIN PORRIDGE


Now is the time of year that something is stirred within me. I feel it first in my toes, then my knees, my stomach and, starting on the first day in September, it begins to bubble up throughout the month until I am completely overtaken. I call it Pumpkin Obsession. That's right, I'm infatuated with them - those beautifully orange, and green, and white, and blue, haphazard little [and big] orbs. Breakfast - pumpkin. Lunch-pumpkin. Dinner - pumpkin. Dessert - pumpkin. Pumpkin, pumpkin, pumpkin.

Pumpkins are the one vege-fruit [they're officially classified as a fruit but are commonly known as a vegetable] that is 100% American. Many of the other foods we eat hail from all ends of the earth but pumpkins, aah pumpkins, are one of our only homegrown, patriotic symbols that America does have roots in food and an image that is different, at least for a short time in the calendar year, than those tragically familiar yellow arches. Better yet, they are one of the few foods that can't be found out of season, increasing their charm to, well, near immortal.

Maybe this is why I long for fall, reaching for it each summer, begging it to come closer and stay longer. Or maybe it is because deep down I believe that America can change. That someday we will earn the right to be known as something other than the "fast food nation", "the most obese nation on the planet", "the wealthiest nation with the poorest health", or any other one of the many phrases that have come to describe this land we love.

Well, whatever it is about these beautiful icons of hope, home, and harvest that captures me, I grow them, eat them, freeze them, and stare at them, somehow believing that if I don't, they'll leave me for good and those annoying, much-to-common arches will be crowned our king.

So here is my salute to the pumpkin, to America and to you.


[CREAMY PUMPKIN ICE CREAM]


A special note: Before I share this recipe, I'm going to let you in on a little secret I discovered, perhaps by accident, during one of my ice cream making adventures. I decided to try brown rice syrup as a sweetener in lieu of maple syrup or honey and found that it not only gives subtle sweetness but also keeps the ice cream from freezing into one solid mass. Instead, you will find it comes out of the freezer ready to be served, no thaw time necessary!


2 c. regular organic coconut milk
2 c. frozen pumpkin chunks [unfrozen puree would also work here]
1 c. brown rice syrup [or to taste]
2 tsp. vanilla extract
1 - 2 tsp. each ground nutmeg, cloves, allspice, and ginger [more or less to taste]
2 - 3 tsp. ground cinnamon [more or less to taste]

Refrigerate coconut milk [and pumpkin puree if using] until cold. In a blender, mix all ingredients until very smooth. Start with the lesser amounts of spices and work your way up until the taste you want is achieved. You can also add more pumpkin for stronger flavor.

Pour into ice cream maker [if using] or glass container. Make to manufacturer's instructions or cover and freeze until firm.

Serve with a sprinkle of nutmeg and some gingersnap cookies.


[BABY'S PUMPKIN PORRIDGE]

1/3 c. quinoa, finely ground
1 c. purified water

Bring water to boil in small saucepan. Add quinoa and cook until creamy, appx. 90 seconds, stirring constantly. Set aside 1/2 cup and store the remaining quinoa in a glass container, refrigerated, for up to 3 days.

1/2 c. organic pumpkin [cubed or puree]**
1/2 c. cooked quinoa cream [from above]
1/2 c. organic applesauce*
dash each of cinnamon and nutmeg

If using cubed pumpkin, place all ingredients in a food processor and blend until smooth. If using puree, simply combine all ingredients, stirring until well mixed.

*Making your own applesauce: wash, peel [or not, I usually don't], slice and core organic apples of choice [if using something other than organic apples, please wash really well and peel]. Place in a saucepan and add about 1/2 inch of purified water. Bring to boil over high heat and then reduce heat to low. Simmer until apples are very soft. Remove from heat and allow to cool slightly [15 - 20 minutes]. Place all [juice and apples] in blender and blend on med-high until very smooth. Freeze in ice cube trays for easy use or refrigerate for up to 3 days.

**Making your own pumpkin puree: Making homemade pumpkin puree is really easy and the taste is worth any effort. I prefer the cheese or pie pumpkin varieties.

Carefully cut the top [stem area] off the pumpkin [cut about an inch or two away from the stem in a circle] and remove all seeds and strings. Cut pumpkin into wedges, place on parchment paper lined cookie sheet, and bake at 425 degrees for 30 minutes or until very soft. Allow to cool about 10 - 15 minutes and then gently remove pumpkin skins using hands [be careful, very hot!] or knife. Place pumpkin chunks in food processor and blend until very smooth. Store in freezer.

Friday, September 16, 2011

10 SIMPLE COLD WEATHER MEALS: PART I

These meal ideas are dedicated to all of you over-worked, under-paid, stressed out, prematurely graying parents of 50 [okay, you fill in the number but I'm sure it feels like that some days] who, if you are really honest with yourself, consider cooking low on [and some days at the bottom of] the priority list. Don't feel guilty about this! For many, this is your reality. So, that is where I am going to meet you today - in the mud of scattered toys, the muck of "I need it NOW!", and the sticky mess we sometimes call life. And the best part, even the non-cook in your house can whip these up!

These recipes are in keeping with the seasons so you probably will find a little more meat or animal products and a little less cucumber.  That being said, even in the winter, meat products should take a backseat to legumes, root vegetables, and whole grains.

A note about the seasons:

Although it's not winter [yet], in my neck of the woods it is getting cooler and my body is beginning to crave a warmer selection of foods. This is evidence that our bodies are directly connected to the earth on which we live.

Eating seasonally is easier on both your body and the environment. In the cooler winter months [assuming you are from a northern region], the body needs extra warming, dense, more fatty and filling foods to enable itself to stay warm and healthy. Many of these foods are mucus forming that, in this case, is a good thing. I'm not talking about the nasty green stuff that comes sailing out of your nose when a cold comes to visit. I am talking about the lubricating substance the body makes in order to keep you, your skin, and every other part of your body well hydrated.

Foods that are consumed in their proper season generally require less fossil fuels [especially for transportation] and less chemicals [for growth, color and flavor retention, bug and bacteria prevention and transportation]. Even if you aren't that interested in caring for the environment, eating in this fashion means healthier air, dirt, and water which it turn leads to less pollutants entering your body, allowing you a healthier life. Even better, it means all of this for your children. 

[MEAL 10: WHOLE CHICKEN IN A CROCKPOT]


This recipe is the epitome of simple and comes from my friend Kim who now claims the east coast as her home. Whenever I make it I think of her - gotta love that soul food that comes with the food.

1 whole chicken [organic, pasture raised], thawed

4 tsp. Real Salt sea salt
2 tsp. paprika
1 tsp. onion salt*
1 tsp. ground pepper
1/2 tsp. garlic salt *

Mix all of the spices together [or put in covered container and shake well]. Rub over chicken, covering thoroughly. Place the chicken in a Crockpot. Sprinkle on any remaining seasoning. Add enough water to cover about a 1/4 - 1/2 inch of the bottom. Cook on low for 8 hours. Serve with mixed rice [brown, black, wild] and a side of steamed, frozen veggies.

[MEAL 9: VEGETARIAN CHILI]


This recipe is originally from my dad, adapted by both my mother, and then myself. This will make a lot of chili and can be frozen for later!

A note: Normally I advocate making dried beans from scratch [here's why] but in this case I am providing a recipe that can have either canned or homemade beans. In my opinion, it is better to get some legumes in the diet rather than none at all. Please purchase organic if possible.

2 tbsp olive oil
4 pint jars of medium salsa, homemade or organic if store bought*
2 [48-ounce] jars of mixed beans
1 [15-ounce] can of butter beans, drained
3 [15-ounce] cans of black beans
4 [15-ounce] cans of chili beans
1 [15-ounce] can of Great Northern beans
2 [15-ounce] can of kidney beans, light and / or dark

In crockpot, add all ingredients and cook on low for 8 hours.

*You can also substitute the salsa with the following: 3 green peppers, 1 large sweet onion, 1 [15-ounce] can of diced tomatoes or whole stewed tomatoes, 2 [15-ounce] cans of tomatoes with green chilies.

[MEAL 8: SAVORY BLACK BEAN SOUP]


I'm not sure where I acquired the original recipe for this soup but if it is yours, thank you [and please let me know so I can give credit where credit is due]!

Lightly saute the following:
4 garlic cloves, minced
1 tbsp. extra virgin olive oil
1 onion, chopped
2 carrots, chopped

Add the following and saute 1 minute more:
2 tsp. celery seeds
1 tsp. cumin
1/4 tsp. cayenne
1/4 tsp. Real Salt sea salt

Combine these remaining ingredients and the ones above in a crockpot:
6 c. cooked black beans [you can used canned or homemade here]
1 thumb size piece of kombu [optional]*
4 cups of vegetable stock or water
2 tsp. mirin or rice wine [optional]
1 tbsp. tamari

Cook on low for 8 hours. Remove 1/4 of soup and puree or blend just before serving. Mix in with the un-pureed soup.

Serve with 1/2 a sandwich or two slices of lightly toasted bread [I love this recipe but you can use store bought as well] dusted with a little salt, garlic granules, and a pinch of cayenne pepper.


*What is kombu? Well, I'm so glad that you asked! Kombu is actually a seaweed but, trust me, there is nothing fishy about it. When added to a soup or any other dish that is simmered or slow cooked, it enhances the flavor and nutrients and generally dissolves into the soup during the cooking process. One note, if you are pregnant you should not eat kombu in excess as it reduces masses in the body [like tumors and cysts].

[MEAL 7: ITALIAN PASTA]


1 bag of gluten-free pasta of choice [I use the Tinkyada brand]
This Italian dressing recipe
1/4 c. raw sunflower seeds
Real salt sea salt, fresh ground pepper, and any additional herbs [to taste]

Cook pasta according to package instructions. While pasta is cooking, make dressing according to recipe instructions. Combine all and heat until thoroughly warmed.

Serve with steamed organic frozen veggies of choice.

You could also make this a pesto pasta by swapping out the dressing for homemade or store bought pesto. You can use pine nuts in lieu of sunflower seeds but either taste great.

[MEAL 6: CREAMY CHICKEN SOUP W/ A VEGETARIAN AND "SUPER-EASY" OPTION]


I snatched this recipe from my friend Diana right before I left Atlanta, GA and adapted it to fit my dietary needs. She found the original recipe in a magazine but, again, I don't know which one so thank you to it's creator! This soup can be made four ways, an easy option and a super easy option and with or without chicken. I'll note below.


For the easy option, saute the following in a cast iron skillet about 5 minutes:
2 tsp. extra virgin olive oil
1 c. chopped onion
1 c. diced carrots
1 c. sliced celery or 1 tbsp. celery seed
1 garlic clove, minced

Add to skillet and cook an additional minute:
1/3 c. gluten-free all purpose flour [appx. 1/8 c. each brown rice flour, tapioca flour or arrowroot, and potato starch]
1 tsp. dried oregano
1/2 tsp. dried thyme
1/2 tsp. poultry seasoning

Place vegetable mixture in Crockpot.

For the super easy option:
Combine all vegetables [noted above] in food processor and pulse until chopped. Add flour and spices to vegetables and pulse again until flour is incorporated. Put directly in Crockpot.

Continuing both options, add to vegetables [in Crockpot]:
6 c. chicken broth or vegetable broth
4 c. diced potato [with or without peels, per preference]
1 tsp. Real Salt sea salt
1 whole chicken breast [optional]

Cook on low for 8 hours.

For easy option:
About an hour before dinner add 1 c. of non-dairy milk of choice and uncooked gluten-free pasta [optional - I like the Tinkyada brand]. Cook until noodles are soft.

For the super easy option:
Add 1 cup of non-dairy milk and 2 cups of cooked gluten-free pasta to Crockpot, warm for 5 minutes, and serve.


Sunday, September 11, 2011

SUNDAY MORNING DELIGHTS

Sunday mornings are something I look forward to each week. The slow, lazy way I stretch my way out of bed knowing that the only thing I have to do is - well, nothing really. Beautiful isn't it?

Instead, endless opportunity awaits me. Go to church? Stay in bed? Make breakfast? Or not? Listen to music? Enjoy the quiet? Take a walk? Do some yoga? Play with the hubby and baby? Have some solo time? Breakfast on the porch? Breakfast in bed? Go out for coffee or stay in?

Well, this morning I was feeling particularly inspired by the pumpkins in my garden and decided to make a spiced pumpkin latte and homemade spiced pumpkin waffles with maple-ginger syrup. Actually I'm playing it fast and loose with the word coffee because I really prefer a coffee substitute or herbal coffee but you can whatever suites your fancy.

So today, may you remember that Sunday is a gift. May you take full advantage of the world that waits - a world where work sleeps. And may you steep yourself in the flavors of fall. Grace and peace.


[SPICED PUMPKIN LATTE]

1 c. water
2 tbsp. coffee substitute [or to taste]

Bring water to boil. Place coffee grounds in bottom of French press and add boiling water. Let steep until desired flavor is achieved [I prefer strong and let stand for 7 - 10 minutes]. If you are without a French press, simply brew a pot of organic* coffee [if you go this route, make it a little stronger than you normally have it].

1 c. non-dairy milk of choice [I prefer coconut milk or nut milk]
1 heaping tablespoon of pumpkin puree*
1 tbsp. raw, unprocessed honey
splash of vanilla extract
pinch each: ground cinnamon, nutmeg, cloves, allspice, and ginger

In small saucepan, slowly bring milk, vanilla, and spices to boil. Remove from heat and pour into blender. Add honey and blend on med-low until froth is formed.

Place coffee in mug. Gently pour milk mixture over coffee, holding back froth. Spoon froth on top of latte. Sprinkle with spice of choice [I like nutmeg or cinnamon].

*A note about coffee: If you are choosing to use regular coffee I urge you to consider choosing an organic variety. The taste rivals any Starbucks [a testimonial about that in a minute] and is better for your body, the people growing and harvesting the beans, and the environment. Coffee beans have one of the highest pesticide counts of all the foods we consume and because it has become a regularly consumed beverage [which I do not recommend for a host of reasons] it is even more vital that it be free harmful and deadly chemicals. In regards to the environment, organic coffee is grown in and around existing canopy trees, thus reducing the mass clear-cutting of rainforests that happens or has happened on many coffee plantations. Organic [which is also typically fair trade, look for the label] also gives the people growing and harvesting the coffee beans a fair wage for their work, improving life for many third world or poverty-stricken countries. Oh, and my testimonial on taste. For over a year I secretly stashed organic, fair trade coffee beans in our pantry coffee canister. My husband seemed to believe that he had to have Starbucks which is the cause behind my undercover op. I smiled when he would rave about the coffee, thinking it was Starbucks. After a while I decided to come clean. Now he raves about his organic coffee!

[SPICED PUMPKIN WAFFLES WITH MAPLE-GINGER SYRUP]

1 1/2 c. brown rice flour
3/4 c. tapioca flour
1/2 c. potato starch
1 tbsp. sugar or honey
2 tsp. baking powder
1/2 tsp. salt

1 egg
4 heaping tbsp. pumpkin puree*
2 tbsp. extra virgin olive oil, coconut oil, or grapeseed oil
2 tbsp. apple cider vinegar
1 2/3 c. non-dairy milk, more if necessary
2 tsp. vanilla extract

Organic butter or non-dairy butter substitute of choice
Maple-Ginger syrup [see recipe below]

Sift together dry ingredients. Add wet ingredients and mix well. If the batter is too thick, add more milk. The batter should be on the thicker side but easily poured. Pour into waffle iron and cook according to manufacturer's instructions.

Syrup

1/2 c. maple syrup
1-1" slice of ginger, peeled
tbsp. pumpkin puree*

In small saucepan combine all ingredients and bring to gentle boil using low heat. Remove from heat and serve immediately.

* Pumpkin Puree

Making homemade pumpkin puree is really easy and the taste is worth any effort. I prefer the cheese or pie pumpkin varieties.

Carefully cut the top [stem area] off the pumpkin [cut about an inch or two away from the stem in a circle] and remove all seeds and strings. Cut pumpkin into wedges, place on parchment paper lined cookie sheet, and bake at 425 degrees for 30 minutes or until very soft. Allow to cool about 10 - 15 minutes and then gently remove pumpkin skins using hands [be careful, very hot!] or knife. Place pumpkin chunks in food processor and blend until very smooth. Store in freezer.

Thursday, September 8, 2011

BEANS, BEANS THE MAGICAL FRUIT!

Whenever someone mentions "less meat" I have this tendency to go into what I call "protein panic". That's right, it's this American-diet induced fear that if I don't have meat every day my body will somehow fall apart, collapse on itself, and betray every other effort I have made to eat well and make healthy food choices. Unfortunately brilliant advertising, convincing "scientific" studies, and a lot of meat money have made this a common belief among many. The truth is we don't need that much meat and our bodies are probably telling us so in the form of bloating, flatulence, nutritional deficiencies and other unpleasant SOS calls.

I want to make it very clear here that I am not saying meat is a bad thing. In fact, there are times that my body cries out for meat and I happily indulge trusting that my body knows what it needs because I am doing my best to listen. This became very evident to me when I was pregnant and I practically crawled across the table to sink my teeth into my husband's [pasture raised, grass fed, organic] steak [not one of my more classy moments but I will fully exploit the pregnancy card on this one]. What I am saying is that our diet could use less meat and there are great alternatives that will provide the nutrients we need.

Legumes are one of these examples. Containing roughly 17 - 25 percent protein they can easily compete with meat in this category while also bringing calcium, potassium, iron, zinc, and several B vitamins as back up punches. And a bonus? They are low in fat! Combine these little guys with some whole grains and you have a complete essential amino acid profile meal.

And one more little tidbit about this pair [grains + legumes] - they are the only foods that boast all of the major nutrient groups: carbs, protein, fats [high-quality, healthy amount], vitamins, minerals, and fiber. Like I said, just a little thing.

So my challenge? Try swapping out one or two meat-full meals a week with a meat-free one. Start small and notice how you feel. If you are overcome with feelings of lightness, awareness, vitality, and energy after eating, know that it is your body's way of thanking you. Also pay attention to how you feel after you eat a meal [or a series of] with meat. If you feel sluggish, tired, and heavy your body is crying out for lighter fare.


[AN IMPORTANT NOTE]

I prefer to make my legumes [or dried beans] and grains from scratch which means these meals take a little bit of forethought because both whole grains and legumes are easier on your overall digestion if soaked. Think of it in terms of pulling the meat out of the freezer the night before. I choose the homemade route for a few reasons. First, I can control the sources [organic vs. not], what is added [chemical / preservative-free vs. not], and eliminate the tin or aluminum can [which has probably leeched chemicals into the beans]. Second, I prefer the taste. And third, I know that they have been soaked properly guaranteeing better digestion.

[WHY SOAK?]

Phytic acid, a substance found in whole grains, blocks the absorption of iron, calcium, magnesium, copper and zinc [also known as the body's buddies] by combining with them and making them impermeable to the intestinal wall [in other words, making traitors out of them]. As if this isn't enough, enzyme inhibitors are also a part of this grainy deal [if you remember, enzymes work to break down food so the body doesn't have to do all the work meaning they are muy importante!]. Lucky for us, these little phytic and inhibiting bullies are easily disabled by sprouting, overnight soaking, and fermentation.

Despite what that old saying may say [you know the one, "beans, beans the musical fruit..."], "tooting" is not a great thing and in fact, may be a sign of intestinal irritation, poor digestion, and allergies [none of which feel good]. Soaking legumes helps to break down the sugars [oligosaccharides] making them more digestible and minimizes that not-so-nice aftermath.


[UM...A LITTLE "HOW" HELP?]

Soaking is really simple.  Place your beans or grains in a non-reactive bowl [glass or enamel works well]. Cover with triple their volume in water because beans / grains could triple in size. Cover and soak 7 - 24 hours [see chart below]. Check beans / grains to see if they are fully hydrated. If not, re-cover and soak for a few additional hours, up to 24 hours. Once the soaking time is completed, drain and discard soaking water and rinse thoroughly at least twice.

Soaking will reduce cooking time requirements so check the beans from time to time while they cook.

Sprouting is an additional step you can take to make beans and grains even more digestible and increase protein content. You could also add  1 - 2 tablespoons of an acidic soaking medium [like lemon juice or apple cider vinegar] per cup of water to improve digestibility.


BEAN TYPE / SOAK TIME [IN HOURS]               

Black Beans / 24
Black-eyed Peas / 12 - 24 *
Chickpeas / 24
Lentils / 7
Navy Beans / 12 - 24 *
Pinto Beans / 12 - 24 *
Red Kidney Beans / 12
Split Peas / 7

* smaller beans = more soak time

GRAIN TYPE / SOAK TIME [IN HOURS]

Amaranth / 24
Brown Rice / 7
Millet / 7
Oat Groats / 12 - 24
Quinoa / 12
Teff / 24


Tuesday, September 6, 2011

ODE TO THE CANNER


If you are anything like me, you have probably been busy enjoying the last days of summer by trying to get in one more beach day, longing for walks in the park, and in reality spending most of your days in the kitchen putting away food for the winter months. That's right, I have been watching the pot boil, as ill-advised as that might seem according to that proverb-esc quip. August and September have become quite ritualistic in that sense - chop, mix, cook, stir, pour, seal, boil, pop!, and repeat. This year I have learned two very important lessons: first, be sure you know exactly what two bushels of peaches actually look like before you agree to purchase them and second, prepare two weeks of meals in advance because if not, the cooking dinner thing takes a serious hit.

This post is going to be short and sweet [and, my apologies, void of many pictures]. Really it is a sort of e-log of what I have put away this year just in case something disastrous happens to my food journal. It is also somewhat of an explanation for my absence from blogger-world.

[From Canning for a New Generation by Liana Krissoff]

Classic Cucumber Relish p. 131, 6 pints
Plums for Pies and Cobblers p. 119, 6 pints
Chinese Plum Sauce p. 120, 12 half-pints
Dilly Beans! p. 135, 7 pints
Pickled Greens with Fresh Chiles p. 231, 7 pints
Good Ketchup p. 173, 4 pints

[From The Ball Blue Book by The Ball Company]

Bread And Butter Pickles p. 49, 6 pints
Roasted Red Pepper Spread p. 82, 16 half-pints
Stewed Tomatoes p. 24, 16 quarts
Fruit [Peach] Nectar p. 22, 8 pints
Canned Plums p. 21, 21 quarts
Canned Peaches p. 20, 21 quarts
Vegetable Stock p. 65, 26 quarts

[From The Complete Book of Small-Batch Preserving by Ellie Topp and Margaret Howard ]

Traditional Garlic Dill Pickles p. 132, 18 pints
Basic Chunky Tomato Salsa p. 182, 30 pints
Roasted Vegetable Pasta Sauce p. 231, 12 pints
Seasoned Tomato Pizza Sauce p. 228, 17 pints
Blender Ketchup p. 235, 4 pints
Peach Lavender Jam p. 43, 13 half-pints

[From The Art of Preserving by William Sonoma]

Tomato Brushetta, 9 pints
Tomato Basil Sauce, 6 pints

[Other]

Vanilla Spiced Peach Jam, 18 half-pints
Elderberry Syrup from Recipes for Vibrant Health by Rosemary Gladstar, 10 half-pints
Roasted Tomatilla Salsa Verde from Organic Gardening Magazine, 5 pints and 4 half-pints